


AstroCrafts December 2017 Solstice Sun and Earth Table Center Piece Northern and Southern Hemisphere Solstice
Nov 21
2017
by Kathleen Horner
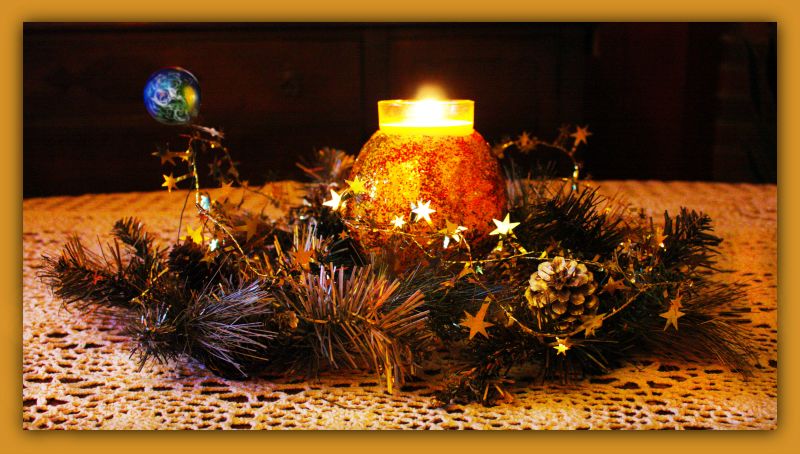 Solstice Table Center Piece
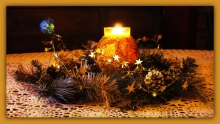
In the photo above note that the Earth ornament is titled away from the candle Sun depicting how the Sun's light hits the Earth for the December winter and summer solstices. Obviously, the positioning of the Sun and Earth are not to scale in this centerpiece. This is an art project, therefore, I chose to utilize a more artistic and symbolic depiction of the position of the Earth to the Sun to fit into the table wreath. See below for detailed directions on how to create your own Solstice table centerpiece.
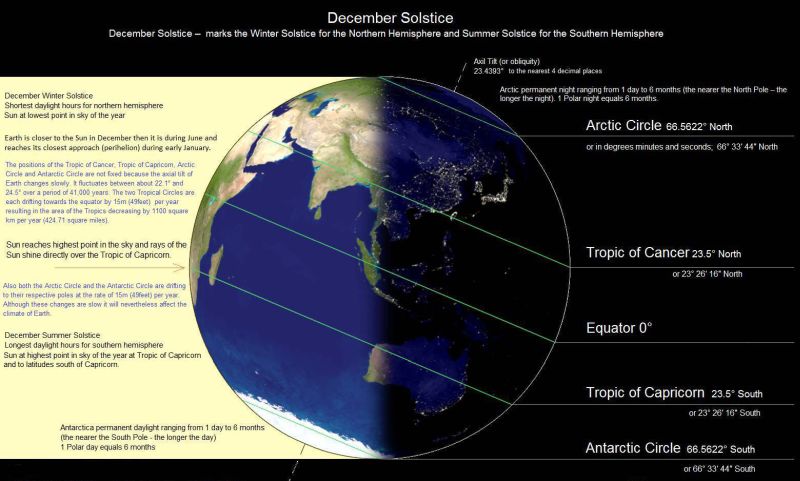
And so on our beautiful blue planet, the seasons continue to turn as the Northern Hemisphere prepares for the growing cooler temperatures of the Winter Solstice and the Southern Hemisphere welcomes the warm rays of the Sun of the Summer Solstice. On December 21 Earth experiences two solstices in relationship with the Sun. On these days the rays of the sun directly strike one of the two tropical latitude lines. The Earth's axis is tilted from perpendicular to the plane of the ecliptic by 23.45. (You can see in the photo above that the little earth globe mimics this effect!) The first day of the Summer Solstice is the longest day of the year while the first day of the Winter Solstice is the shortest.
Regardless of where we live on Earth, we are all one people, one sky with the Astronomers Without Borders community and through this AstroCraft project, we will honor both Solstices by creating an astronomically beautiful table center piece for the solstice season ahead.
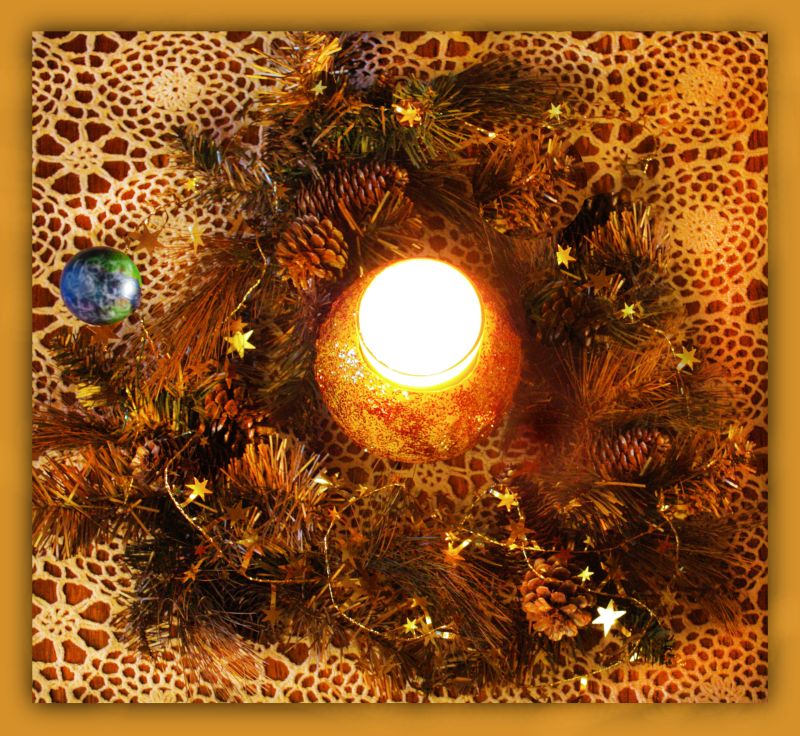 Top view of Winter/Summer Solstice Center Piece
How to create a Solstice table center piece
There are so many ways in which you can create your very own solstice table center piece. The best way is to begin collecting nature found objects outside in your yard, a park or the woods. This is an earth-themed project so go outside and look for native plants and other wild things. There is an abundance of native plants, wildflowers, berries, leaves, twigs, pine boughs, cones, nuts, ornamental grasses, small rocks and other nature objects to be found. Look around the house for holiday decorations, old wreaths, summer or winter themed decorative objects, miniature figurines such as animals and insects. The same applies to a summer solstice themed centerpieces such as adding artificial butterflies, birds, flowers, a collection of shells from a visit to the beach and warm weather native plants. You can buy basic wire wreaths to attach your decorations and found objects to or go all out and get a wreath already made and add your personal touches to it. Weave vines, twigs, and berries together to make a natural rustic wreath. You can even add little-painted planets from styrofoam balls and metallic stars to your wreath for a space theme. The ideas for creating a table center piece are endless. Use your imagination!
Creating your table center piece
Choosing a theme and the contents of your wreath center piece will be up to you. I will share with you how I made my papier mache 'Candle Sun' and little Earth globe so that you can work it into your center piece
Materials for Earth Globe
Small styrofoam ball (for Earth globe) - 1 3/4" diameter (a little larger or smaller is fine)
Tall pillar candle - gold or bright yellow (diameter size can vary)
Acrylic paint: Blue, White, Green, Brown
Heavy duty green floral wire
Hot glue gun and glue stick
Papier Mache Sun Candle Holder
What you need
• flour
• water
• mixing bowl
• spoon
• balloon blown up to 5" diameter (or whatever size diameter required for your candle)
• Elmer's glue and paint brush
• Gold and Red glitter
• 2 1/2 inch square thin block of wood
Activity
Mix one part flour with one part of water (1 cup flour and 1 cup water, or 1/2 cup flour and 1/2 cup water) until you get a thick glue-like consistency. Add a bit more water if it's too thick.
Mix well with a spoon to get rid of all the lumps. If you find you are getting lumps in your glue, you can use a whisk or a small kitchen electric mixer to whiz them out.
Add a few tablespoons of salt to the final mixture to help prevent mold.
Applying wet paper to balloon surface:
• You can use strips of newspaper, old scrap paper, paper tissues or paper towels.
• Let the newspaper strips soak in the paper mache glue a little before using.
• Cover your artwork with only 2-3 layers, then let dry completely. This is an important step. Be sure make the surface as smooth as possible.
• Once a layer is dry you can add 2-3 more layers, remembering to let each layer dry before adding the next one.
• The final layer can be plain paper - so it's easier to paint - but use the thinnest paper possible and make sure it's soaked well in the paper mache glue.
Once all layers have been applied, hang the covered balloon up to dry for 24 hours. When dry, cut the balloon out from the top of the globe and pull out any remaining remnants. Measure the diameter of your candle (I used a candle in glass). You can use a tall pillar candle, also. At the top of the globe mark the diameter size and neatly cut out it wide enough for the candle to fit inside. Once you have cut it open, begin painting the globe in bright yellow and orange paint mixing here and there as you go. Let dry. Then go back to painting a layer of Elmer's glue all over the globe and while the glue is still wet, sprinkle the gold and red glitter all over the globe for a sparkling Sun effect. Let dry and then place into the center of your table wreath. My candle Sun fits perfectly in the center piece (I found a little glass bowl to set it in), but since the bottom is round it is advisable to glue the globe onto a thin 2 1/2" square block of wood so it will sit upright rather than roll over. Paint the wood block any color you desire.
Next, you will paint the styrofoam Earth ball. Paint the entire ball with a layer of blue and let dry. Begin painting the continents and let dry. You do not have to be encyclopedic in your style of painting--just create a loose suggestion of continents. Next step is to finish by lightly painting clouds over the globe in a swirl-like fashion. For a painting guide, three pictures of the Earth are shown below. After your Earth globe is dry, take the floral wire and bend the tip (about 1/2") back enough to represent the angle of the Earth to the Sun at solstice. Cover the tip of the bent wire with a little dab of hot glue and push the bent tip into the bottom of the Earth globe. Make sure you are holding the globe firm and straight up (perpendicular) while pushing the bent wire tip into the globe. Attach the Earth globe and wire into the center piece placing it to one side of the candle Sun as shown in the photos above. (See photo inset below for close up of Earth globe and wire). There you have it…Voila! If you do create a solstice center piece, please share it with us at www.astronomerwithoutborders.org. Wishing you a very happy solstice season!
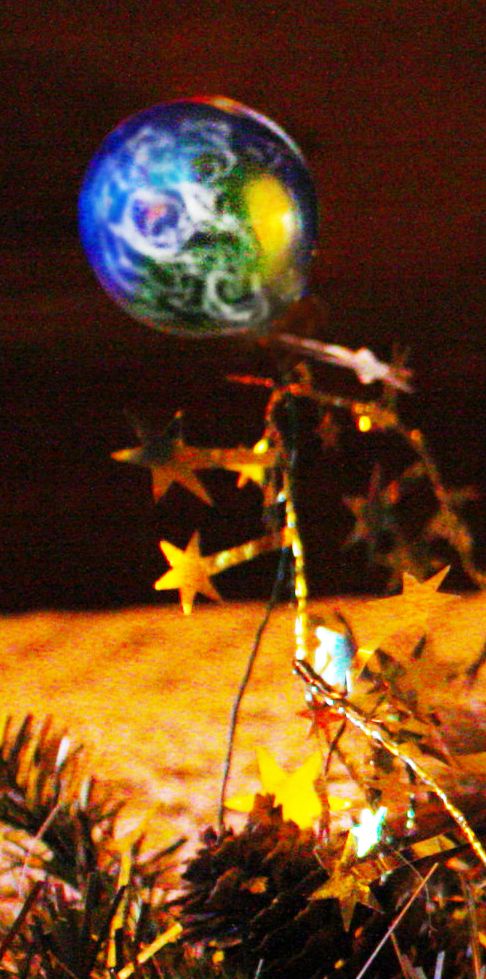
Notice how the Earth globe is tilted back away from the candle Sun's light once the wire was attached to the center piece.
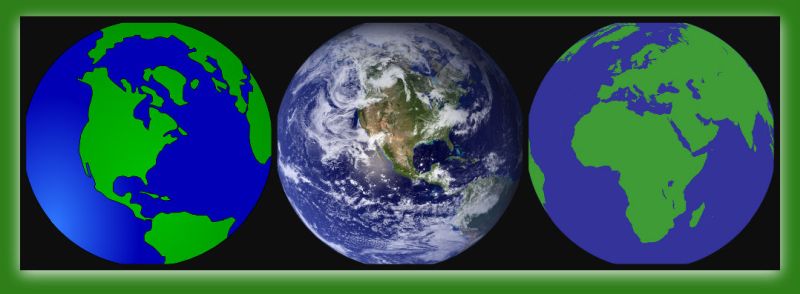
Painting guide for Earth globe
You need to be logged in to leave a comment
Post a Member Report about this Program
Share your activities with others around the world by posting a Member Report for the worldwide astronomy community to see! Your reports help Astronomers Without Borders show sponsors how successful our programs are, too!
Frances Azaren
Latest News
| Our Sponsors |  |
Become a Sponsor |
| |
Copyright © 2009-2020 Astronomers Without Borders
Back to Top |
|
Comments