
Imagining Black Holes Through Art
By Kathleen Horner
In this AstroCrafts project, we are going to be experimenting with different acrylic painting methods to create a black hole painting. Black holes continue to mesmerize and mystify scientists. American physicist Kip Thorne describes a black hole as "a point where all laws of physics break down." Just recently, we have for the very first time received a real glimpse of a black hole. That's exciting! Scroll down to the bottom of the page to see the historical photo and story. Enjoy your imaginative journey into deep space and get inspired to create your own original painting of a black hole. The whole family can play and learn together with paints with this artistic and creative AstroCrafts project. Wishing you all an exciting and fun Global Astronomy Month!
WHAT'S INSIDE A BLACK HOLE?
https://www.youtube.com/watch?v=FoExPq04OQQ and for children, NASA Space and Astronomy for Kids -- Black Hole--https://www.youtube.com/watch?v=XnFSia31Pl0
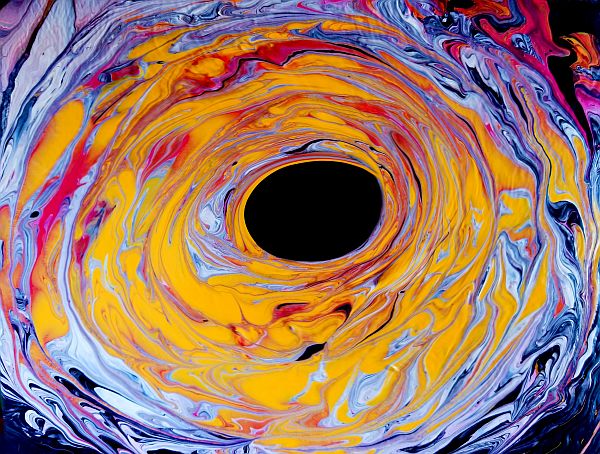
Kathleen Horner, Acrylic Paint Pour (Photo A)
See below for instructions on how to paint
Kathleen Horner, Acrylic Paint and Water with Brush & Sponge (Photo B)
See below for instructions on how to paint
Splatter Acrylic Painting by Kathleen Horner (Photo C)
See below for instructions on how to paint
POUR PAINT METHOD (Photo A)
I was inspired by Tiktus Color Art (video link below) to create my own pour paint black hole (photo A). If you like the video, please give it a Like and Subscribe. The painting would look rather interesting without the paint flowing all the way over the edges of the canvas as seen in the video. Nice effect leaving some of the black color which can represent the blackness of deep space. This is a great video in that it breaks down every phase of the pour painting method. You can find many other videos highlighting how to create a pour paint/fluid paint image on YouTube. See photo below from the video I followed:
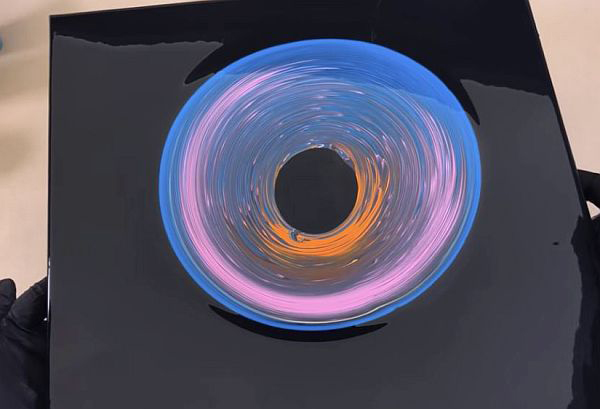
Credit: Tiktus Color Art
I used Apple Barrel acrylics to create the two paintings highlighted in this project. If the paint is too thick to pour and move across the canvas, a simple mix of craft acrylic paint and water will help to create a more flowing consistency. You can experiment with paint consistency on cardboard or paper. A consistency of pancake batter works well. In place of a measuring cup, I used a paper cup pinched into a spout on the top edge to pour the paint. It is recommended that you use latex gloves and something to cover your clothing as this method is a little messier than brush painting, but loads of fun to see how the paint creates its own special magic. No one painting is alike. Of course, there are so many other ways you can use the pour paint method to create a black hole painting. Experiment with it and see which way you prefer. The two links I have shared below should get you started.
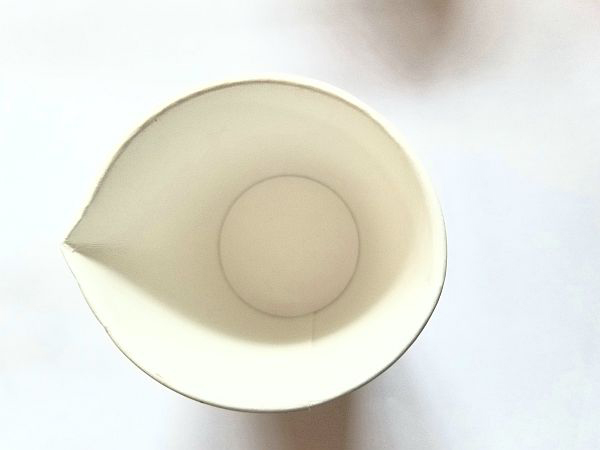 Paper cup with spout
Watch Tiktus Color Art
https://www.youtube.com/watch?v=EwyucgqKDuE&t=192s and https://www.youtube.com/watch?v=yndPwAMGEgg
Materials
*Acrylic paint (check local craft and dollar stores for Folk Art, Apple Barrel, Plaid, Ceramcoat, or other fluid craft acrylic paint. Unless you want to create a masterpiece, just stick with the inexpensive craft paint I have listed here.
*Stretched canvas frame, sturdy and thick cardboard, foam core board.
*Plastic or paper cups
*Brushes- different sizes
*Latex gloves
*Water
*Smock or apron
*Protective cover for workplace
*Popsicle sticks, spoons, etc. for mixing paint with water
ACRYLIC PAINTING WITH BRUSH (Photo B)
I began with painting the surface of the canvas dark blue, letting it dry and then splattering with white paint. I used an old toothbrush filled with paint and held it up over the black surface and then ran the handle of another paint brush over the bristles. You can also use a paint brush filled with white paint and tap with your fingers against the handle over the painted surface. This technique gives the image an effect of stars in space. Next after letting it dry, I drew a round circle with pencil to mark the black hole and began painting around it. I used both a brush and crumpled up ball of plastic wrap. You could also use small sponge cuttings for special effects with the paint. After running my brush and making my special effects and blended the paint colors using a combination of dry and wet brush carefully around the black hole and filled it in with black paint. You can use your imagination in creating your very own black hole painting. For instance, I loved the idea of sponge painting a galaxy for the background of a black hole. You can see how that is done in these two videos: https://www.youtube.com/watch?v=vGXgqrN_Mfg
and https://www.youtube.com/watch?v=YfmmUdrd8hs
How to Dry Brush with Acrylic Paint
This is a great video showing you how to apply the dry brush method to give your painting some unique special effects. https://www.youtube.com/watch?v=wh2Q0fz9ey0
SPLATTER ACRYLIC PAINTING (Photo C)
To begin this painting, brush some black paint all over the surface of the canvas. Let it dry and place a cut out paper circle in the center of the canvas. This will be your black hole with the paper keeping the black area covered when you begin splattering the paint on the surface. Dip a toothbrush into white acrylic paint and begin splattering on to the canvas with the handle of a brush, pen, pencil, etc. To create a starburst use more concentrated splatter in the center and less as you work outwards from the center. After that dries grab your brush and begin painting around the black hole with bright yellow and reddish orange acrylic paint using a combination of the dry brush technique and added water to the brush to move the paint more freely. Use your imagination.
FIRST EVER PHOTO OF A BLACK HOLE
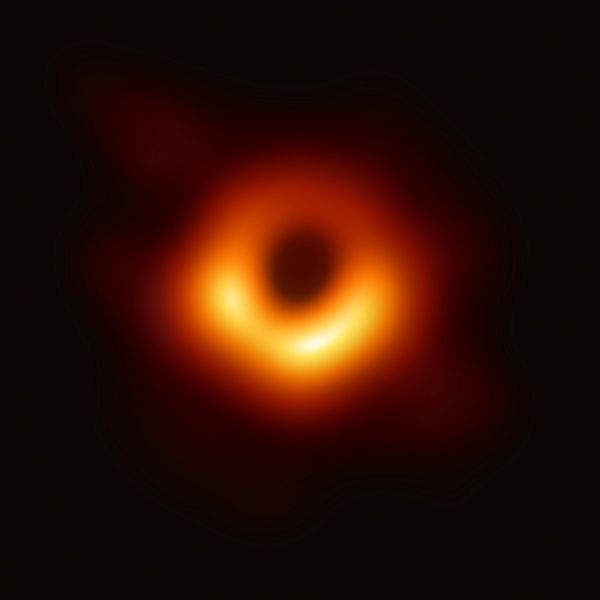
EHT collaboration; NASA/CXC/(Photo D)
Villanova University
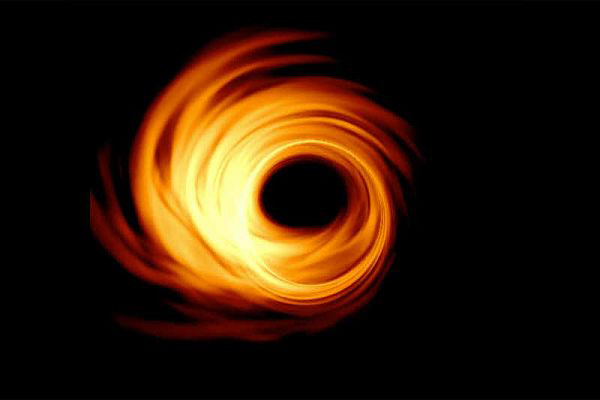
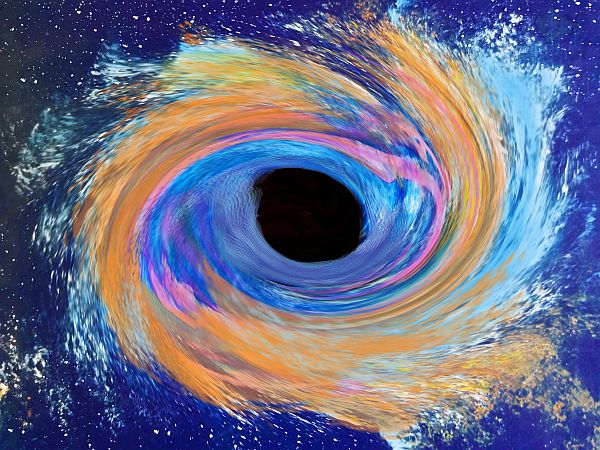
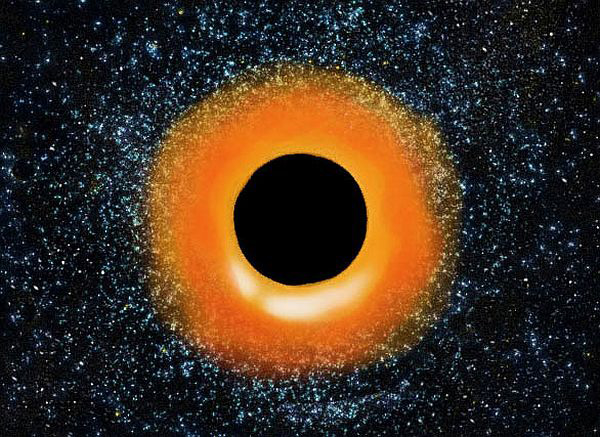
A simulated view of a black hole by Hotaka Shiokawa
Hotaka Shiokawa
The simulated view above of a black hole can serve as an inspiration to you when you go to create your painting as it did for me with the painting I created in Photo C.
PHOTO D
On April 10, 2019 scientists released the first ever image taken by the Event Horizon Telescope of a super massive black hole located in the center of the Messier 87 galaxy (53 million light years). The image was captured by an international collaborative of scientists using eight radio telescopes around the globe to create an Earth-sized virtual telescope. This is one huge black hole with a mass 7 billion times our own Sun and is surrounded by a ring of swirling hot gas and dust outside the gravitational pull of the event horizon. To have a better understanding of the structure of a black hole I included the image shown below.
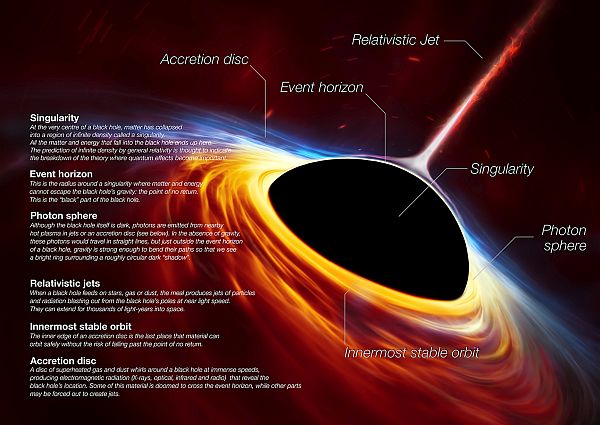
Anatomy of a Black Hole