


by Ger Cawdell, Victoria, BC, Canada
- Published: Monday, January 16 2017 20:22
Before I begin the second installment discussing the types of magnifying glasses I use, I need to supply a disclaimer: I am not an expert in physics, nor I have I received advanced education in optics. The information I am about to supply is based completely on my own experiences.
Skin protection is important. I wear a wide brim hat and usually a long sleeve shirt. As mentioned in the first installment, eye safety is extremely important since the focussed light is tremendously bright, as can be seen in the following image in which the magnified light can be contrasted with the portion of the wood lit by regular sunlight.
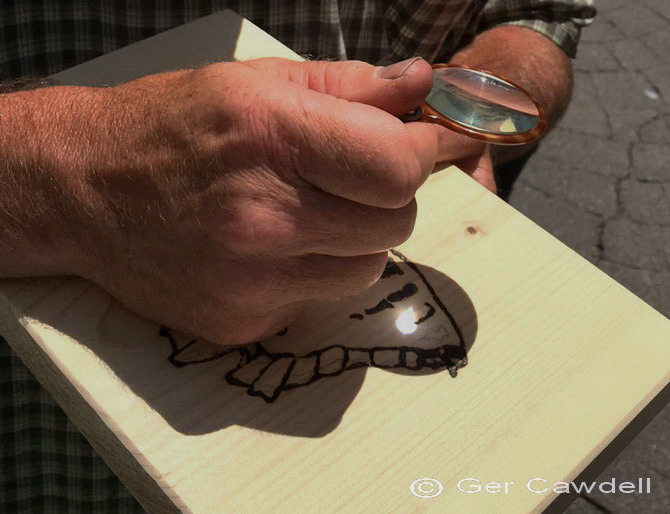
Magnified light not yet focussed, creating “Western Tiger Swallowtail Butterfly”
The next image shows the three magnifying glasses I use. The largest measures 4 ¼” diameter. The lens diameter of the other two are 1 ¾” and 13/16”. Each of my three magnifying glass is a convex lens, the largest being the most powerful while the smallest is least powerful.
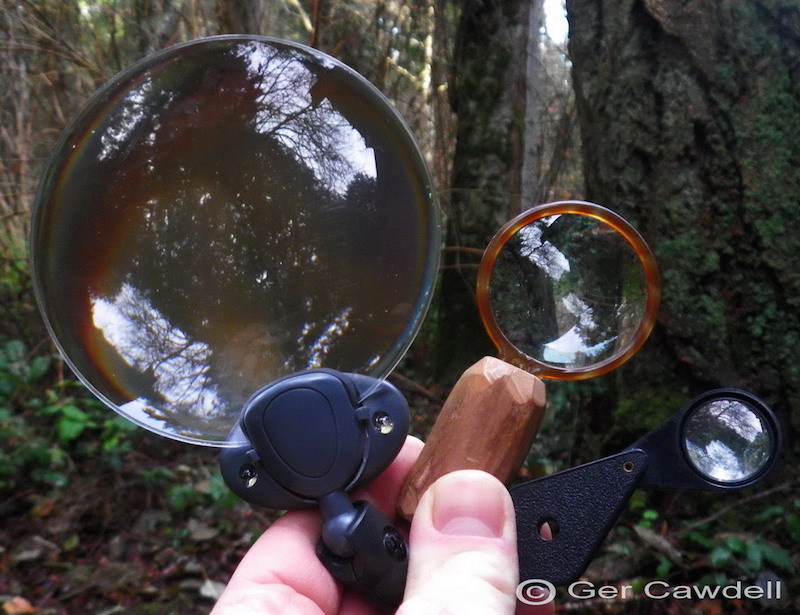
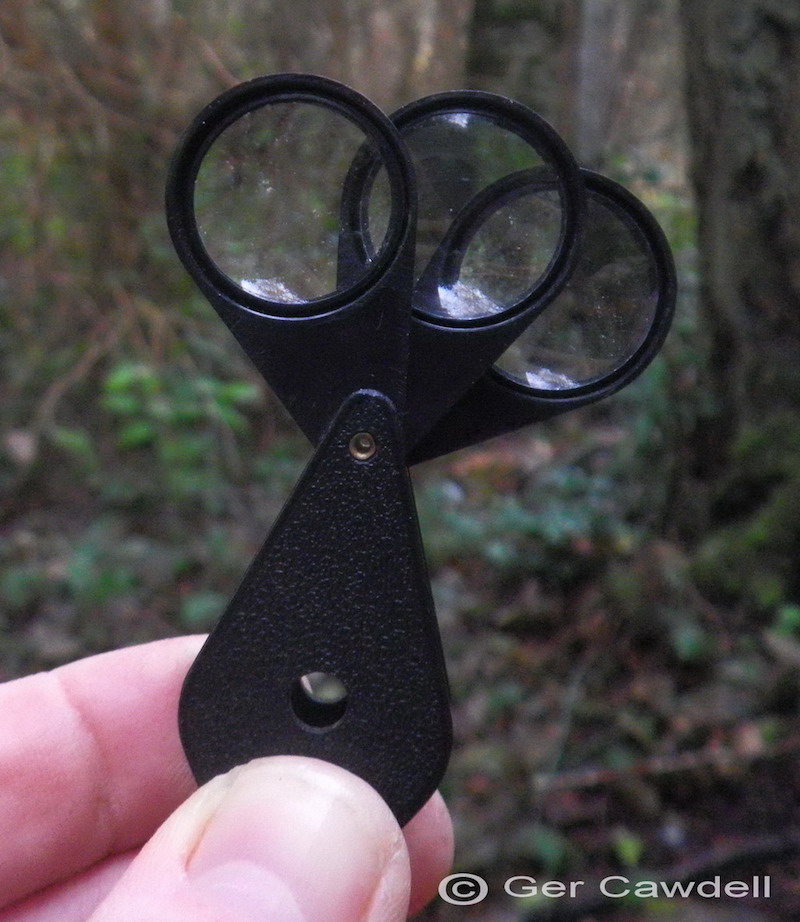
The smallest lens consists of three lenses which fan apart. One of these used alone is not powerful enough to burn the wood but a combination of two or three provide lines of various thicknesses.
My lens choice is based on two variables: thickness of line and how quickly I wish to burn an image. For the majority of my wood burning I use the middle sized lens, as this lens size allows adequate control of burning. The largest lens, being most powerful, burns the fastest but this also reduces control of line. This lens also provides the widest burned line so I use it for areas requiring wide strong lines which do not require sharp edges. In the following image of a limpet and periwinkles, the thick lines of the foreground rock have been burned with the large lens. The limpet and the distant rocks have been burned with the medium lens and the periwinkles have been burned with the smallest lens.
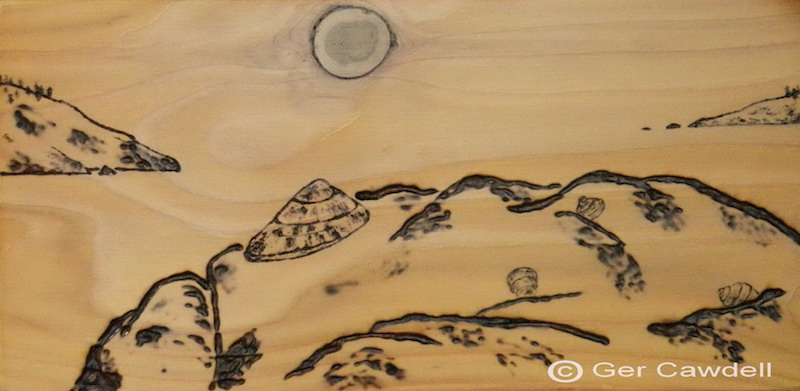
Limpet and Periwinkles 2016
5 15/16” x 12 1/16”
Similarly, the largest magnifier was used to burn along the brown edge of the foreground hillside in the next image. The green mountains were outlined with the medium magnifier and the distant mountains and most of the clouds with the small magnifier. Lines may be widened by focussing the light beside a previously burned line, which is how I burned some of the wider lines of the green mountains.
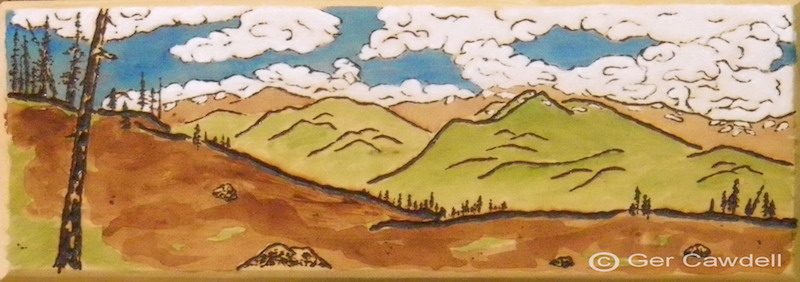
Garibaldi Mountains, BC 2016
4” x 11 3/8”
We have now seen how the thickness of line can be used to denote distance in a landscape. Thickness of line is inversely proportionate to distance. The following image of Turkey Vultures demonstrates this once again, as the higher Vultures have been burned with the smallest magnifier to recreate the high altitude attained by some of the birds.

Turkey Vultures Rising on Thermals 2015
11 ¼” x 11 ¼”
Another use of the smallest magnifier in creating fine lines is to depict delicate objects, such as clouds (seen above in the image of “Garibaldi Mountains“) and flowers, as well as small branches and needles and leaves. The following two images show this to good effect. The first image shows the Magnolia flower’s delicacy compared to the thicker rugged branch to its right. The second image shows the small yellow cherry leaves which have been outlined with a thinner line than the larger green leaves to the left.
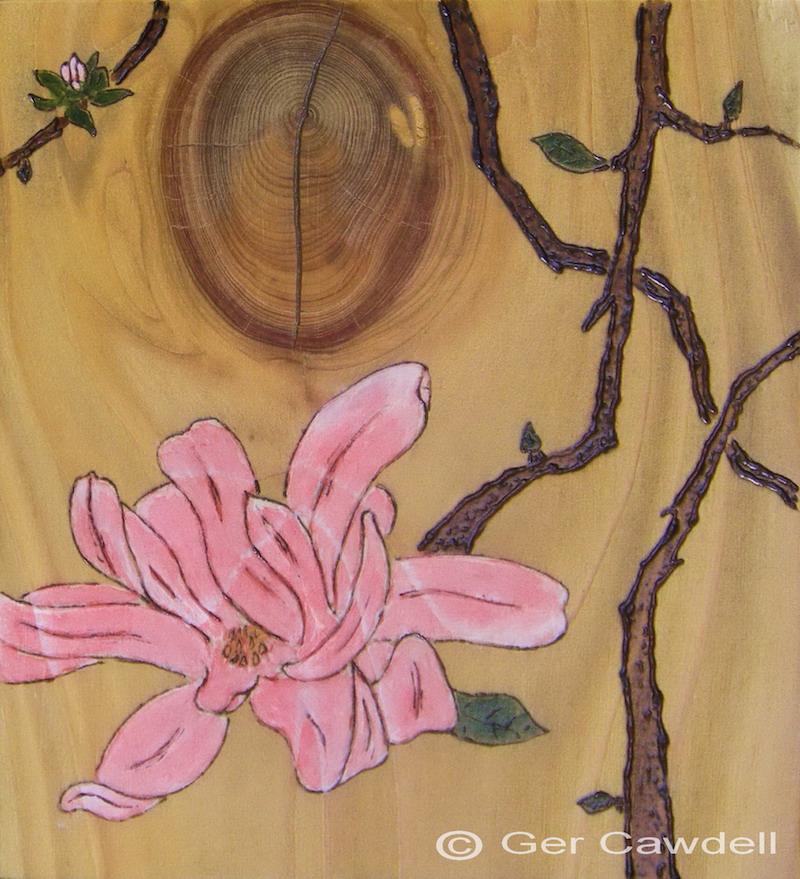
Magnolia soulangeana 2016
6 ½” x 5 15/16”
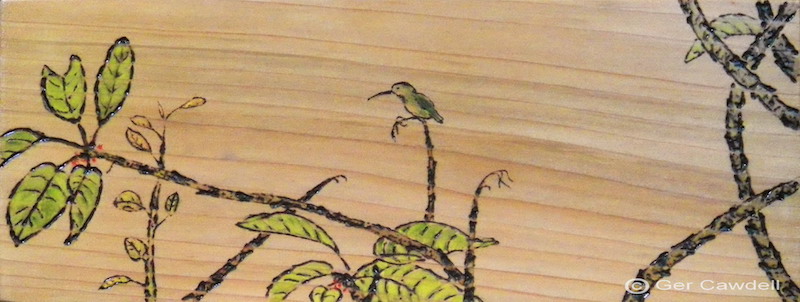
Perched on the Cherry Tree 2015
3 ¾” x 10”
In my third and final post I will discuss the types of wood I use based on how they burn, as well as how I maximize the use of grain and figure of each piece of lumber.

Comments