Solstice Space Sun Catchers and Ornaments
- Published: Friday, December 13 2013 18:37
BY KATHLEEN HORNER
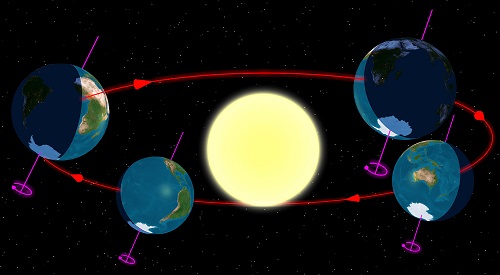
The Earth as seen during the four seasons. Credit: Tauʻolunga/Wikimedia Commons
The Shortest Day
And so the Shortest Day came and the year died
And everywhere down the centuries of the snow-white world
Came people singing, dancing,
To drive the dark away.
They lighted candles in the winter trees;
They hung their homes with evergreen;
They burned beseeching fires all night long
To keep the year alive.
And when the new year's sunshine blazed awake
They shouted, revelling.
Through all the frosty ages you can hear them
Echoing behind us - listen!
All the long echoes, sing the same delight,
This Shortest Day...
-Susan Cooper
And so once more the seasons continue to turn as the Northern Hemisphere prepares for the Winter Solstice and the Southern Hemisphere welcomes the Summer Solstice. On December 21 our planet experiences two solstices in relationship with the Sun. On these days the rays of the sun directly strike one of the two tropical latitude lines. The Earth's axis is tilted from perpendicular to the plane of the ecliptic by 23.45°.
The first day of the Summer Solstice is the longest day of the year while the first day of the Winter Solstice is the shortest. Since we are a global community, we will be honoring both Solstices here on Astronomers Without Borders AstroCraft page by creating some really cool astronomy-related tree ornaments and window catchers to fit into the holiday and solstice season.
Galaxy and nebula tree ornaments and sun catchers
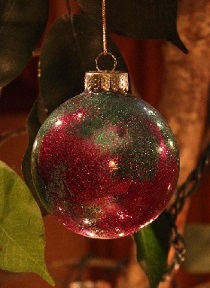
These are a cinch to create and look fantastic either hanging in a window or on a tree. I found these on a cool web blog, "The Swell Life" by Alexa. I was thrilled with the results and finished up six galaxy ornaments of my own with each one displaying a unique one of a kind deep space nebula design. Just pick your colors, swish some liquid floor wax into the glass ornament, pour excess liquid wax out and sprinkle glitter of your choice of colors inside mixing and shaking a bit to disperse the glitter.
What's amazing about these little beauties is that each glitter mix is unique and very different from the other and really do take on the look of a nebula. If you use your imagination a little, the tree lights' reflections on the ornaments give the effect of star nurseries being formed within the nebulas. Look for a well lit place in your home to hang them or place them on your holiday tree. They glitter and sparkle and take you on a sweet flight into deep space!
Directions on how to make them are at this link: . You can find the clear, glass ornaments in various sizes at any arts and crafts store or online. I found mine at Michael's Arts and Crafts. Here's a link if you prefer to buy online.
Southern Hemisphere Summer
"Fellow Being"
Oh, now man you go out there to find out more of us, who down here.
Well listen to that fish talk and you will know we ate it the other day.
And if you talk to a bird of paradise you find they are people, same with
all creatures here, we aboriginals come from them.
If you feel the heat of the Sun, you feel us.
If you see and feel the light of the darkness then you have just touched an aborigine
By Lionel Fogarty
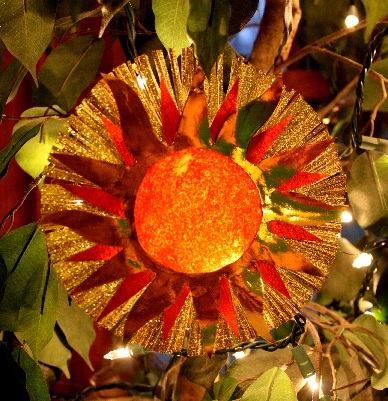
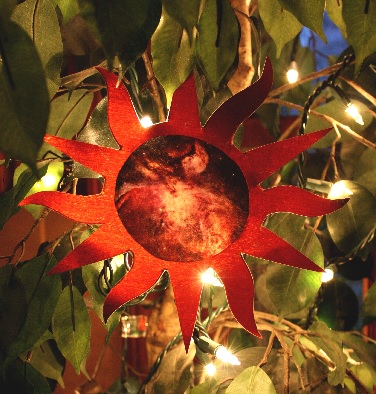
These designs shown below in the photos are my own original creations. They were very easy to make, too. You can go from making quick and fun ornaments with children using their own space art to creating your very own designs showcasing a variety of Hubble space images with elaborate star burst designs. Right now the arts and crafts stores are full of metallic and glitter sheets of all colors, but you can also make your own glitter sheets at home if you cannot find them in the stores.
You can also use ribbons and painted twigs for spikes in the star burst sun catchers. To make the glitter sheet use poster board cut out to the size that you wish to create your ornament rays, paint some Elmer's glue all over the surface and then sprinkle glitter over the wet glue and allow to dry. On the back side of the metallic or glitter paper measure the circumference of the ornament rays by drawing a circle with a compass drawing tool (or use a round lid or object that fits the size of circle you wish) and then placing a dot in the middle. Use this dot to draw a perpendicular line to the top edge of the circle to the bottom edge and then horizontally from one side across to other. Then like cutting a pie (use a ruler) continue to draw lines through the center dot from one edge of the circle to the other side. (See Star Burst Pattern below)
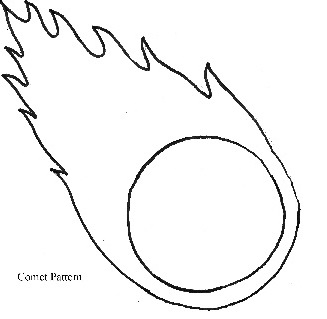

These lines will serve to guide you when you begin cutting out the rays with scissors all around the circle. You can dream up any design that pops in your head. You can also fringe cut with your scissors all the way around the circle for a really neat spray effect (See Photo B). Use your imagination and make the design exclusively your creation. Be sure to cut out the center in the patterns so you can glue your space image along the edges. For each ornament shown below you will need to cut two; one for the front and one for the back.
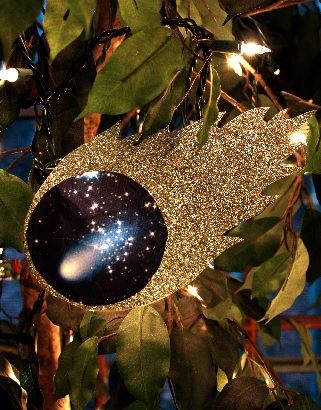
I've provided the Comet and the Star Burst patterns that I used for the ornaments. One example has three layers of star burst designs. Just place your mouse on the image and right click and then click on 'Save Image As' and save to a file on your hard drive. You can pull it up into your photo editing software program and print it out once it is on your computer's hard drive file. Measure the circumference of the cut out center of the pattern adding 1/4" extra to the margin and draw a circle all the way around the image you wish to use. The extra 1/4" will be the part that will be glued and adhered to the inside of the back pattern circle edge. Take your glue stick and attach the back pattern with the center cut out to the front pattern. Your image will be beautifully framed by your original star burst design.
Next get online and find space photos on NASA's Jet Propulsion Laboratory website. Images of the Sun, Moon, galaxies, nebulae, and planets are all listed in there. Here's a link for some spectacular wallpaper space images. The images look best if printed on matte photo paper, but you can also use bright white copy paper, too. The photo paper really makes the images jump out.
After you have finished making your sun catchers, hang them wherever they can catch the light. If you hang them in a holiday tree, be sure the string lights are situated behind the image so it will glow. They look beautiful in a sunny window, too!
Materials
Compass Drawing Tool
Foil, Metallic or Glitter Sheets/Paper of any color
Scissors
Glue Stick
Elmer's Glue
Wide Art Brush
Printing Paper Bright White/Photo Printing Paper
Poster Board
Pledge Liquid Floor Wax
Clear, glass ornaments
Glitter (fine glitter, if you can find it)
That's it for this year's AstroCraft projects! Stay tuned for more AstroCrafts to be showcased in 2014 on the Astronomers Without Borders website and Facebook page. Let us hear from you and if you do create any of the designs above, please share photos with us on the us!
If you have questions about making these designs, please leave them in the comment section below and I will get back to you with an answer. Here's wishing you a great holiday season and a very happy New Year!





Comments