Report
by Kathleen Horner
- Published: Friday, June 07 2013 06:06
Celebrate the Solstice Season with AstroCrafts -- Inspiration is the spinning wheel of dreams set ablaze

Source: greentechrs.com
On June 20 -21 our planet experiences two solstices in relationship with the Sun: One in the Northern Hemisphere being the Summer Solstice and simultaneously in the Southern Hemisphere the Winter Solstice. On these days the rays of the sun directly strike one of the two tropical latitude lines. The first day of the Summer Solstice is the longest day of the year while the first day of the Winter Solstice is the shortest. Many of us around the world will be celebrating either the arrival of Summer or that of Winter in June. The June solstice has been associated with many ancient multi-cultural traditions and continues to be celebrated in modern society (see link below). So whether the season be summer or winter, here on the AstroCrafts page we can all celebrate the Sun in the Solstice season by creatively expressing ourselves through the experience of hands on art thus honoring the Sun's powerful energy that gives life to everything here on planet Earth. Harness the power of the Sun by bringing a little sunlight art into your home and yard. Long after the Sun has set you will experience the gift of solar power! Below is a unique line up of solar oriented arts and crafts to share with you this month so get inspired and let's celebrate the Solstice season and the Sun's gift bearing light.
All About the Solstices
Read up on loads of information on the Summer and Winter Solstice seasons both astronomically and culturally worldwide at this link.
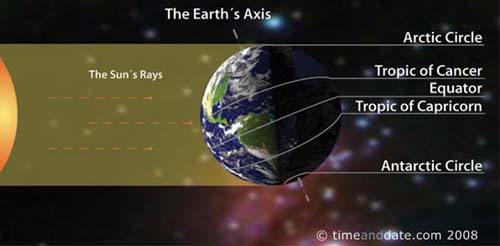
http://www.timeanddate.com/calendar/june-solstice.html
Solar Light Jar Lanterns
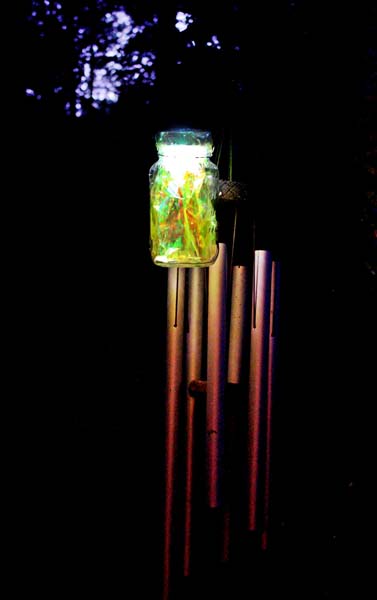
Solar Light Hanging Jar Lantern
The above photo shows a hanging jar lantern I created by using a solar light lamp with clear iridescent tissue paper placed inside the jar for a luminous and glittery special effect. These beautiful lanterns can be used outside in either winter or summer. The website link below will feed your inspiration by giving you a variety of ways you can decorate and showcase your solar light lantern. Although solar light lamps are recommended for this project, you can also use LED click lights for an alternative if you are unable to find solar light lamps. Simply turn the click light upside down and place on top of the jar so that the light will be shining inside the jar. Put a small strips of tape on both sides to keep it in place. Directions on how to assemble and create your very own solar light lantern can be found in the link here.
Solar light jars: http://dishfunctionaldesigns.blogspot.com/2012/07/solar-light-crafts-ideas-inspiration.html Here's a great video to help you to easily construct a hanger for your jar lanterns: http://www.youtube.com/watch?v=nGL61Qlnies I found this exceptional buy on solar lights at Amazon.com: http://www.amazon.com/Garden-Creations-JB5629-Solar-Powered-Accent/dp/B002X8X8UG/ref=sr_1_1?ie=UTF8&qid=1369346764&sr=8-1&keywords=solar+lights
Candle Jar Lantern
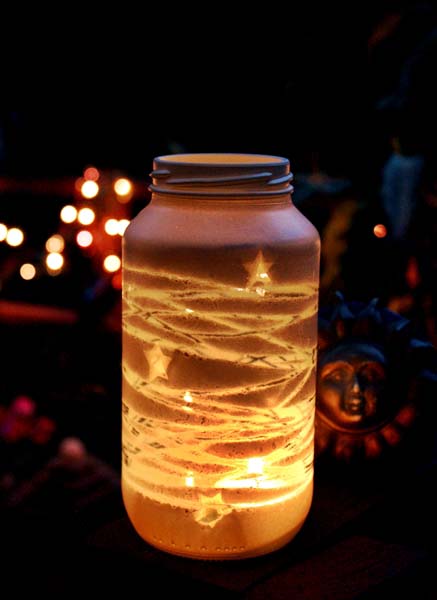
Yarn Wrapped Jar Lantern
This is a fun and very creative art project! I simply wrapped yarn around an old pickle jar and sprayed it with white paint. You can also use ribbon, rope, twine and an assortment of stencils...just use your imagination on this one. I created my own star patterns out of paper and randomly stuck them on the jar with a bit of double stick tape along with the yarn design and then sprayed white paint over the whole surface of the jar. There are all kinds of stencils and patterns that you can find online and print out, too. The light source can be tea lights or pillar candles. Read up on the directions and many different ways you can create your very own jar lanterns at this link -- http://www.theforgestyle.blogspot.com/2011/11/diy-yarn-wrapped-painted-jars.html
Ice Luminaries for the Winter Season

What a wonderful idea for those of you preparing for winter in the southern hemisphere! You can make ice luminaries to light up the cold winter nights. All you need is water, recycled containers and freezing temperatures. Bring the warmth of the Sun's light to your yard on the dark Winter Solstice night by displaying these glowing luminaries. An impressive variety of ways to create your own ice luminary designs are shared on the two links below.
http://www.candgnews.com/news/diy-ice-luminaries-can-spruce-any-party
Balloon Ice Luminaries
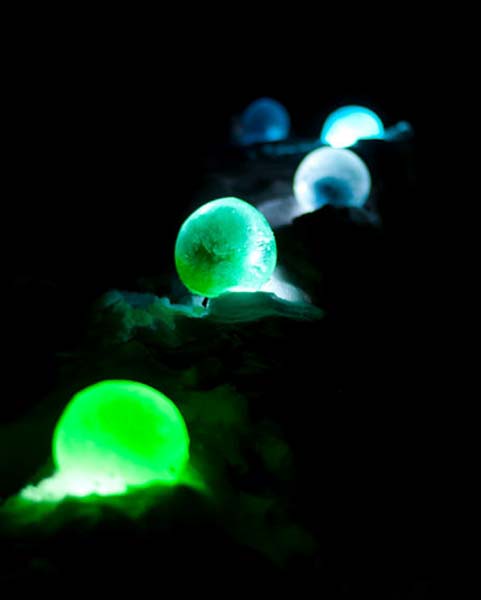
Balloon ice luminaries light up a snow-covered walkway
Such a cool idea....I mean, literally! Find out how to create these easy-to-make balloon ice luminaries at this link: http://www.designmom.com/2013/01/diy-ice-luminaries/
Sun Prints
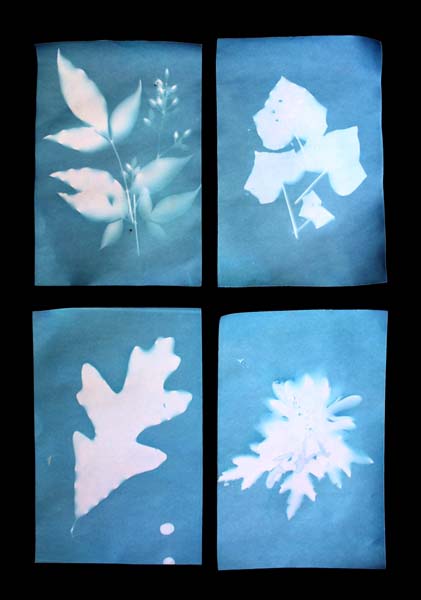
A collection of sun prints I created utilizing solar power
Make amazing white on blue prints with your favorite objects! Just place leaves, flowers, shells, cut out paper snowflakes or whatever you choose on the photo-sensitive paper and place in the sun. It doesn't matter whether it's summer or winter. Just pick a sunny day. Remove the objects after a couple of minutes and rinse the paper to "fix" it. Congratulations, you've made a permanent piece of sun art!
How does it work? The nature print paper is coated with light-sensitive chemicals, which react to light waves and particles when exposed to light. When you place objects on the paper, they block the light and turn white while the paper around them remains blue. Water stops the process and fixes your images on the paper.
Where can I find the print paper? Let your 'mouse' do the shopping and search for these sun print paper companies online (Sun Art Paper, Sunprints, Nature Print Paper and Solar Print Paper) or call your local arts and crafts store to see if they carry the sun print paper.
Construction Paper Sun Print
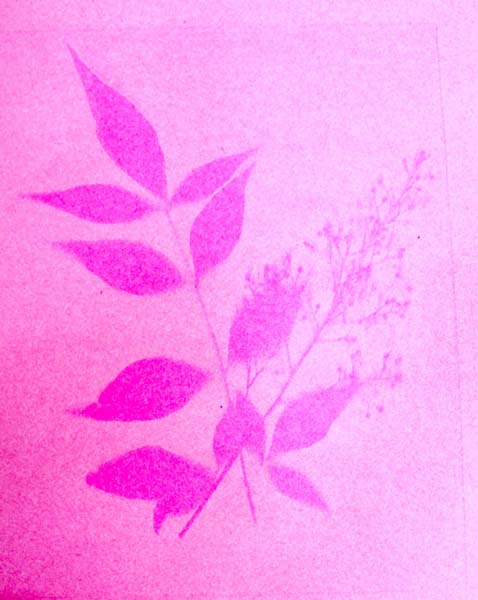
Nandina leaves and berries from our backyard
It's easy as pie to create construction paper sun prints. This is a unique, science-oriented project for the whole family. Just select your choice of colored construction paper and place leaves and other flat shaped found objects on top. Place in a sunny window or if weather allows take it outside under the sun and wait until the paper begins to fade. The solar print image shown above took a full sunny day outside. When the paper has sufficiently faded and you see that there is a strong contrast, remove the objects. Presto! You have a beautiful piece of solar artwork!
What's Happening? The science behind the sun print.
Have you ever left an art project made from construction paper in the sun for too long? If so, you probably noticed that the color started to fade and the paper ended up a lot lighter than it once was. In this project, you covered parts of the paper with flat objects, then when you left your picture in the sunlight, it started to fade. Since the objects blocked sunlight from hitting the parts of the paper that they covered, you could see the original color of the paper after you removed the objects.
Sunlight contains ultraviolet (or UV) rays - the same rays that will give you a sunburn if you are in the sun for too long without sunscreen on. Those rays cause chemical reactions in the dye that gives construction paper its color. When the paper absorbs the rays of light, a chemical reaction breaks down the dyes so they aren't as bright. Works out well when you are looking to create some really neat art.
Fabric Sun Prints
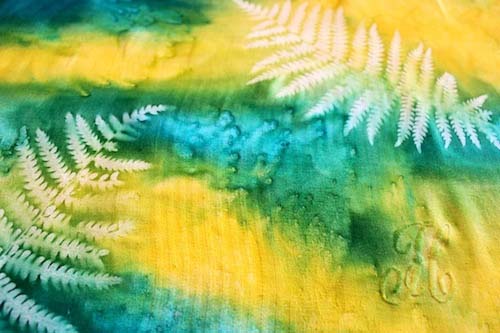
Create some really original wall art with fabric sun prints. This looks like fun and it's at the top of my list for a throw pillow project. Here's a link to get you started: http://www.bloombakecreate.com/2011/06/sun-printing-2/
I hope that you will enjoy this month's AstroCrafts solar art projects and if you do create something from the collection, don't forget to share photos of your work on the Astronomers Without Borders website photo gallery. Happy Solstice to you all!
###
My Recent Reports
Contact
| Location: | Sri Lanka  |
|---|---|
| Website: | thilinaheenatigala.blogspot.com |


Comments