Report
Lunar Wall Hanging
by Kathleen Horner
- Published: Monday, April 02 2018 04:00
Phases of the Moon
GAM 2018
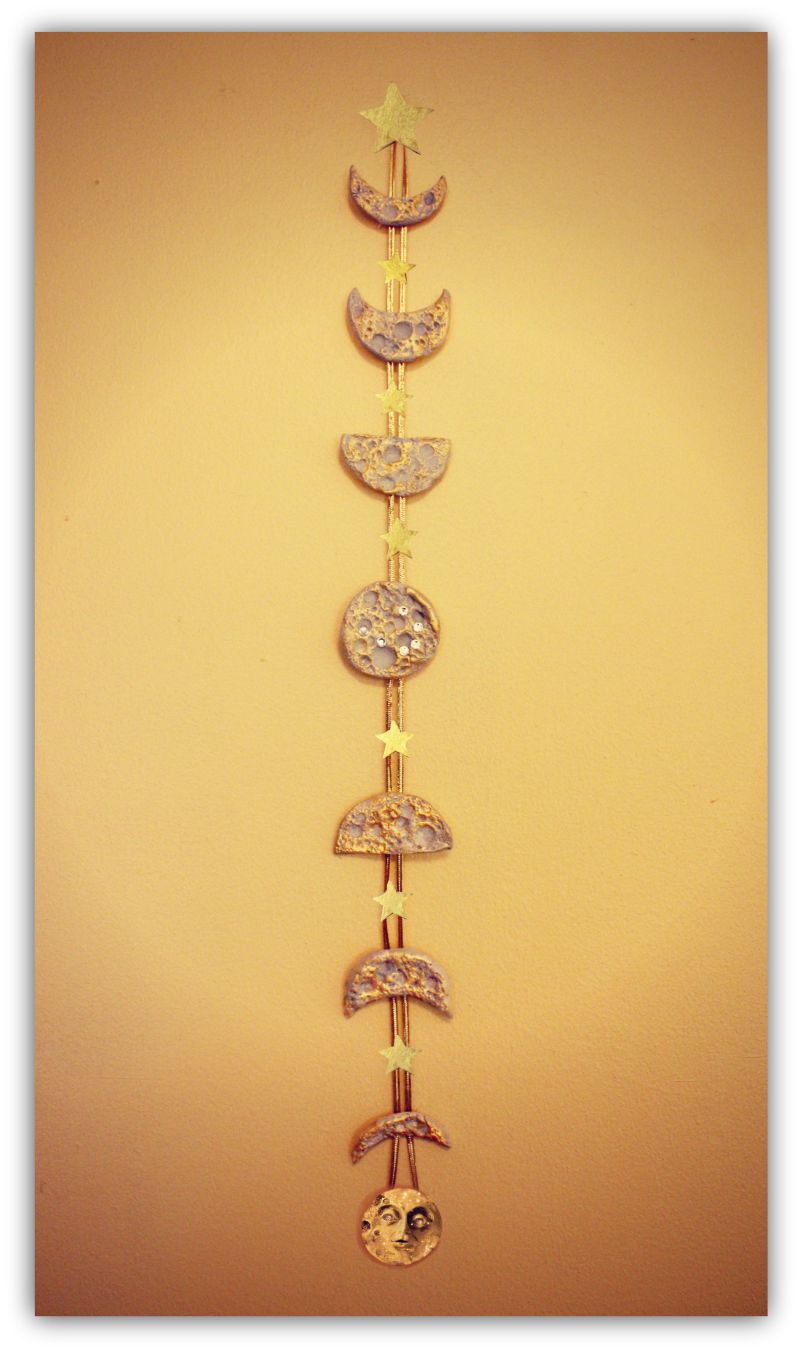
Lunar Wall Hanging by Kathleen Horner
It's Global Astronomy Month 2018 and we are celebrating our Earth's one and only natural satellite, the Moon. For centuries the Moon has fascinated humans--we have fallen under its spell. The Moon has inspired us to ask questions, to explore and to seek answers to the mysteries of our Solar System. It was the first and thus far the only celestial body we have physically explored having left our foot prints to remain forever in the Lunar dust. The Apollo Moon missions catapulted us into the rocket age of space exploration. After that we were ready for interplanetary exploration with orbiter and probe spacecraft from Voyager 1 & 2 to New Horizons and in the near future a manned mission to Mars. In the words of astronaut, Neil Armstrong, the first voyage to the Moon was 'one small step for man, one giant leap for mankind'.
Also fascinating is observing the different phases of the Moon. Everyone on Earth can enjoy Moon gazing from Full Moon splendor whittled right down to a fingernail clip of a Moon. Especially interesting is observing the terminator line or twilight zone on the Moon (best seen with binoculars). It's that slow moving line across the Lunar surface that divides the daylight side and the dark side of the Moon. See below photo B of a waxing crescent Moon and its Terminator line revealing the famous Lunar X and V.
How to Create a Lunar Wall Hanging
In this AstroCrafts project we will create a Lunar Wall Hanging depicting the phases of the Moon. It's a rewarding art project and the whole family can get involved. I had fun creating it and I know you will, too! I have also included some other ways in designing your own moon phases wall hanging in the photo inset below. Of course, there are scads of creative ideas for moon wall hangings and hanging mobiles online if you want to create one different from the one I designed. You can even go abstract rather than realistic renderings. Use your imagination!
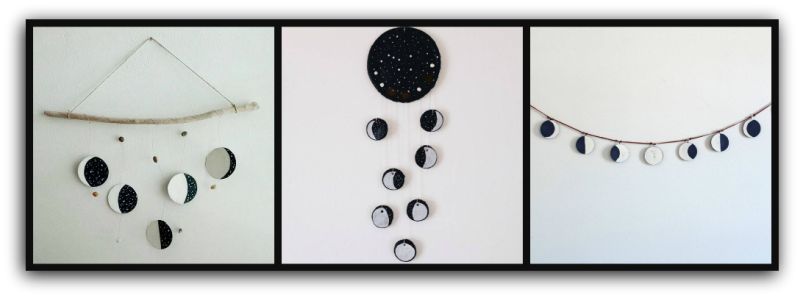
Photo to left credit Sparks and Sprouts Blog, Inset Photo A
The following directions are for the lunar wall hanging I created in the opening photo above. There are many varieties and creative ideas possible in making your own unique lunar wall hanging (see photo inset above). You can also create a hanging mobile using a wooden hoop with some string or cording to attach your uniquely designed moon phases art pieces. Add gem stones, rocks, stars, ribbons, glitter, ornamental clay art (you can make your own), found objects, feathers, and the list goes on. You can use silver paint and ribbon or any other color you prefer.
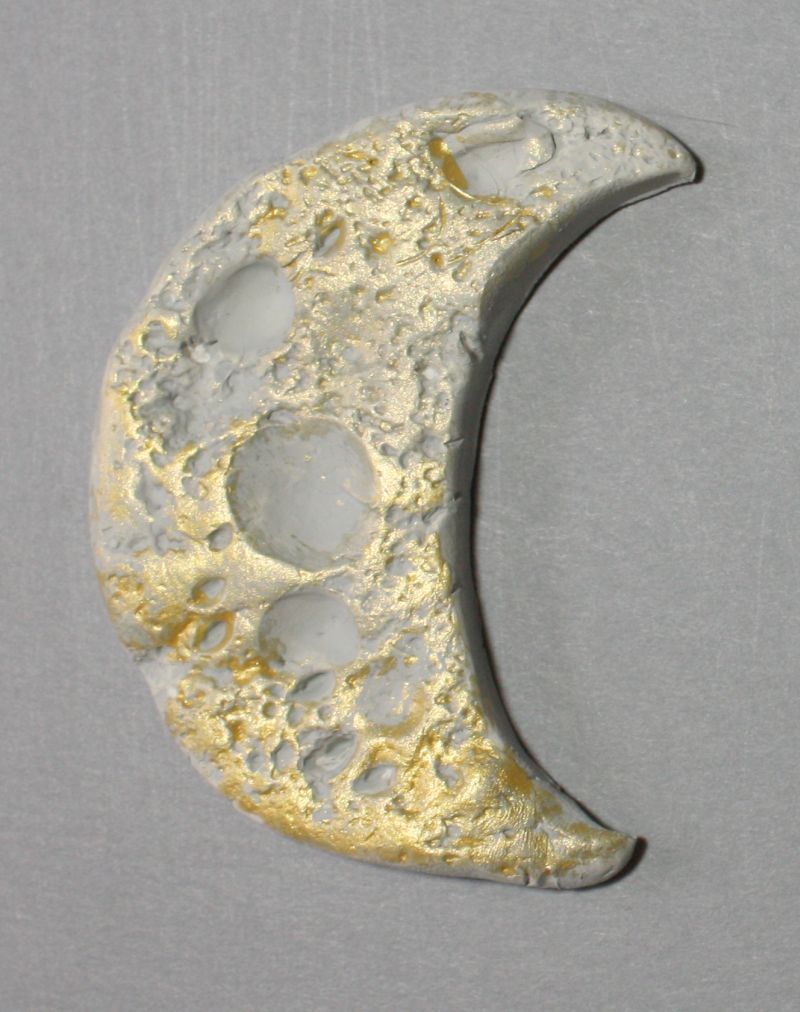
I found Sculpey to be the best in creating moon craters on the surface of the clay disk. Below are some suggestions for modeling material…
Salt dough recipe: https://www.clay-it-now.com/saltdoughrecipe.html
Sculpey polymer clay
Any variety of modeling clay (bake or air dry) found in craft stores.
To get started, check out this list of materials needed to create this wall hanging.
* Sculpey polymer clay (I used Sculpey for this project)
* Light Gold crafts acrylic paint found in craft stores
* Heavy duty gold foil for stars
* Gold ribbon (thin)-48 inches in length
* White rhinestones (for Apollo moon landings)
* Hot glue gun and stick
* Utensils to make craters in clay, ie. end of pencil eraser, end of wooden spoon handle, or any small, hard-rounded object like plastic beads or pebbles.
* Rolling pin
* Wax paper
* Scissors
Making the Moon Phases Art Pieces
Begin by laying out a sheet of wax paper. Take a small amount of clay and roll it into a ball. Take a rolling pin or the palm of your hand and flattened out into a thin, round disk. You can also flattened out the ball large enough to use the mouth ridge of a small glass or jar to cut into the clay for a perfect round shape. Decide on how many moon phases you want to use. I used waxing crescent, first quarter, full, and gibbous moon phases (see moon phases chart, Photo B below).
Creating the Moon Art Pieces Surface
Once you have all art pieces shaped into Moon phases the next step is to create a rough impression just like you would see on the Moon's surface. I pressed the circles against a stucco surface. You can use a scrubbing brush or any other rough surfaced object to make a realistic moon surface. Add some tiny holes with a pin or small nail. To make the craters find any small, round object of varied sizes to press into the disc surface (suggestions above). Put the finished clay art pieces onto a cookie sheet and put into the oven and bake at 170 degrees for about 15 minutes until hardened. Time varies according to the oven. Allow to cool. Note: You can skip this step if you use an air dry clay.
Using Paint
Next pour out some gold acrylic paint on some wax paper and dip a scrap of cloth into it. Rub the paint lightly and randomly over the surface of your newly created moon phase art pieces. Allow to dry. To get an idea of the finish, see the close up photos below.
Assembling the Lunar Phases Wall Hanging
Bring the ends of the gold ribbon together and tie into a knot. Stretch out the ribbon onto wax paper surface in the way that it will look hanging on the wall. Decide how you want to arrange the moon art pieces and begin hot gluing them onto the gold ribbon (see top photo). Hold the double gold ribbons close to each other with your finger as you glue. You can decide to use shiny stars or other ornamentals between the moon art pieces. I used a moon pendant for the very bottom and a larger foil star at the top to hide the knot. Also, white rhinestones were placed onto the full moon piece depicting the location of the Apollo moon landings (pictures online). Now you are ready to hang this lovely piece of art up on your wall! And don't forget to go outside and check the moon phases with the aid of the April Moon chart included below. The website has a moon phases chart for every month of the year.
Close Up Photos of Moon Phases Art Pieces
Light gold acrylic paint smudged on to surface with terry cloth.
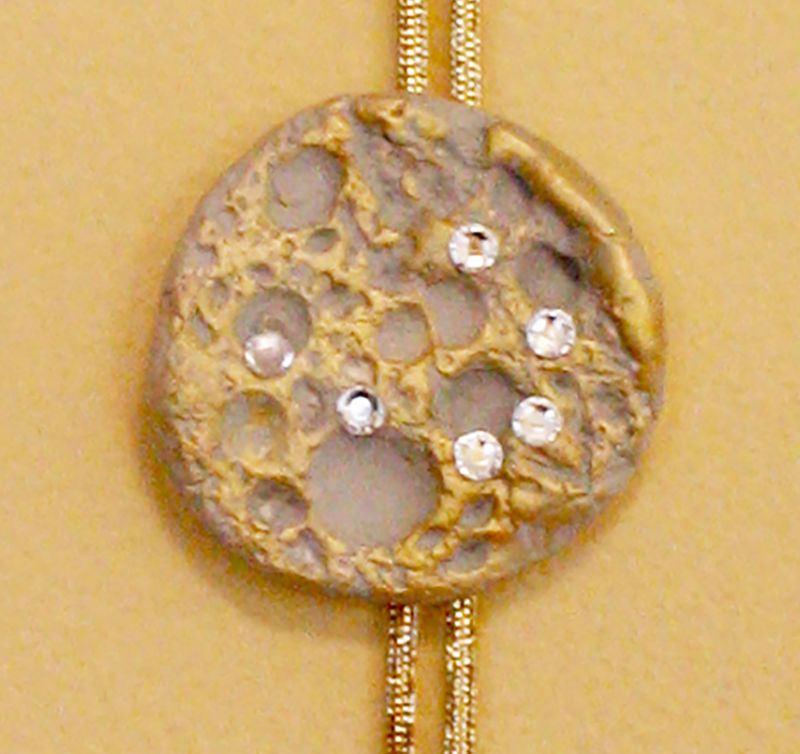
A view of Apollo Moon Landings in white rhinestones.
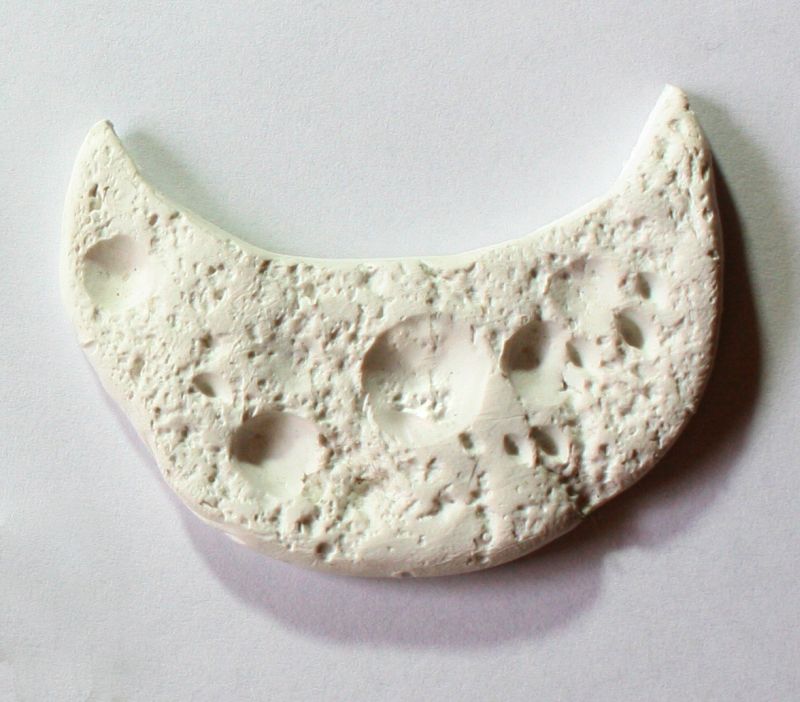
Bare Sculpey crescent moon cut out with craters sculpted into surface.
Phases of the Moon Chart
Below is a chart of April 2018 Moon phases. We have a full Moon coming called the Full Pink Moon on April 29th, although it will not actually appear to be pink (I would love to see that!). The name Full Pink Moon comes from the earliest blooming North American flowers, Ground Phlox. Other Moon in April names are Egg Moon, Full Sprouting Grass Moon and Full Fish Moon.
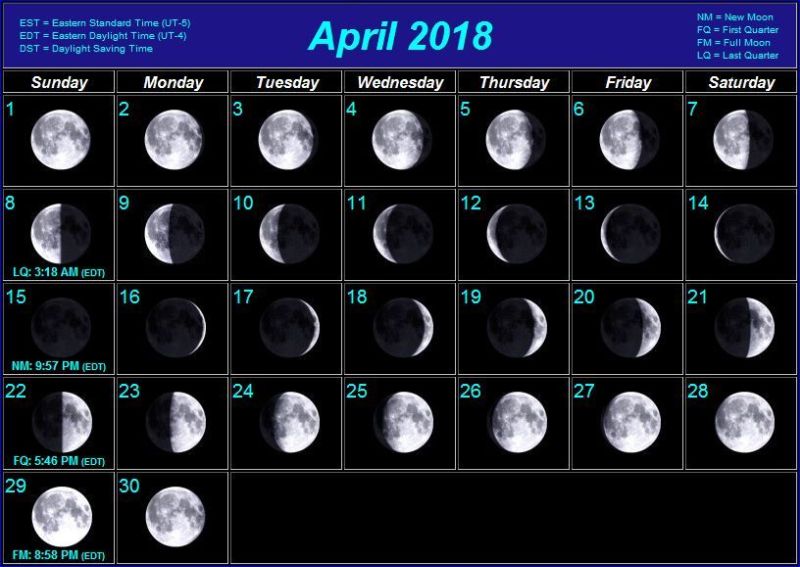
Moon Phases, Photo B
To keep track of the Moon phases in April, go to the page link shown below:
http://www.moonconnection.com/moon-april-2018.phtml
In this photo I took of a waxing crescent Moon, take note that the terminator was perfect in revealing the Lunar X and V! (Lunar V south of pointer). This illusion of Lunar X is created by sunlight falling on the rims/ridges between the craters La Caille, Blanchinus, and Purbach. Next waxing crescent, grab some binoculars and see if you can find the Lunar X and V.
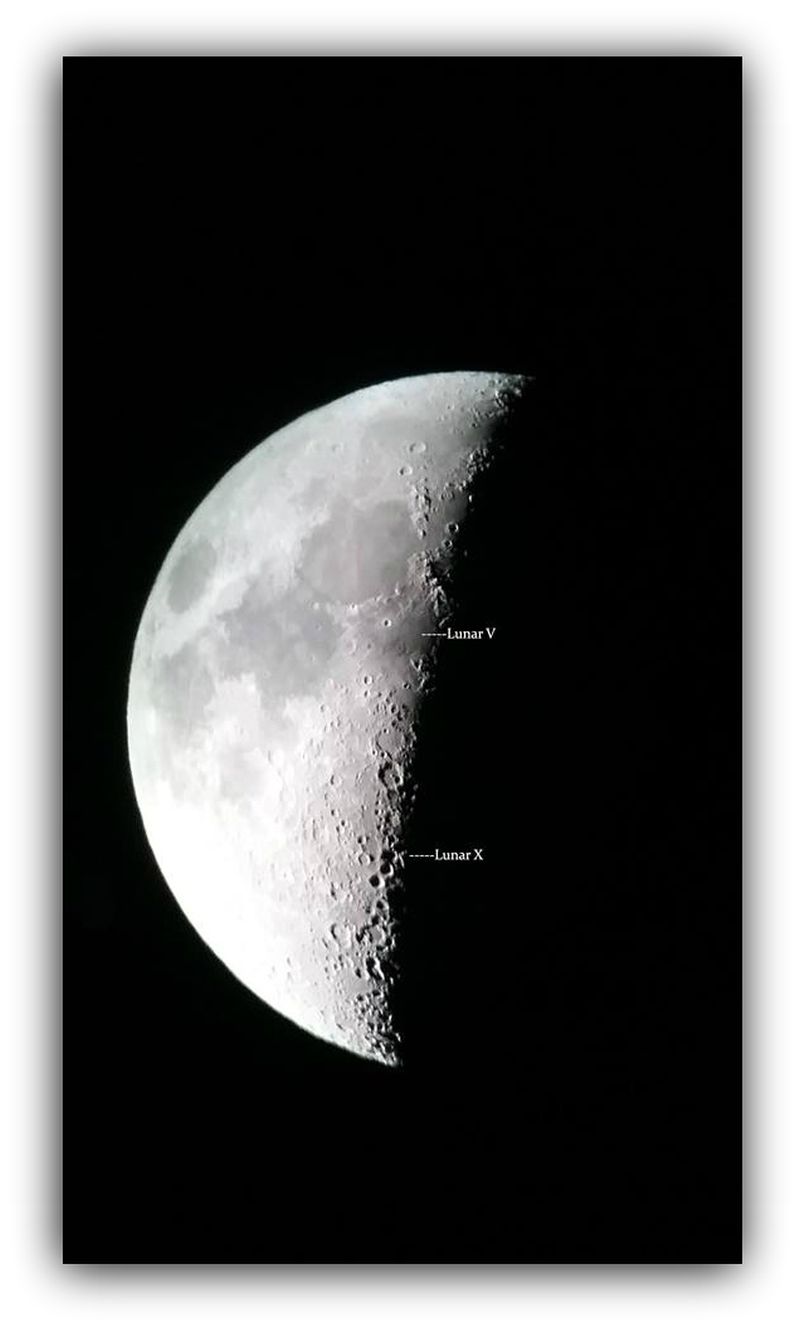
Photo by Kathleen Horner, Exhibit B
To learn more about our Moon, I found this great video, "Evolution and Tour of the Moon". Link is here: https://www.youtube.com/watch?v=avX3Ae9UWTE
credit: NASA/Goddard Space Flight Center
Step outside one night and think about the fact that at that very moment there are millions of other people around the world looking at the same Moon. Remember Astronomers Without Borders' motto, we are one people, one sky.
Happy Global Astronomy Month to you all!
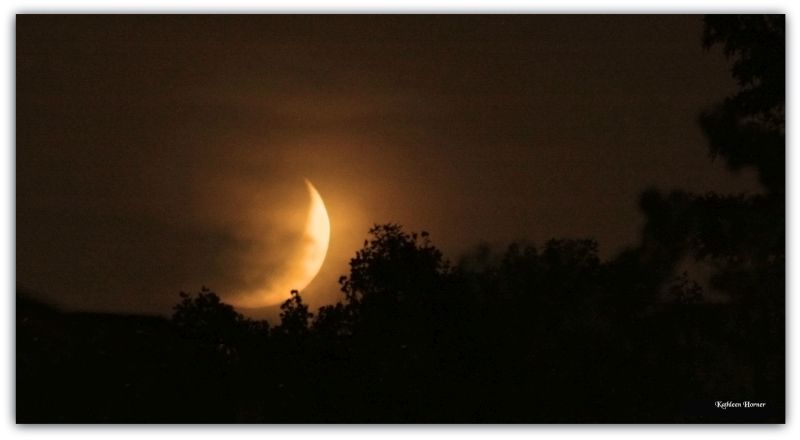
"It is a most beautiful and delightful sight to behold the body of the moon."
Galileo Galilei


Comments