For GAM 2012 use the menu on the right side below
Before you start: You must be registered on the web site before you can register your GAM event. If you do not have a member account, register here before going any further. If you have an account, please log in now.
|
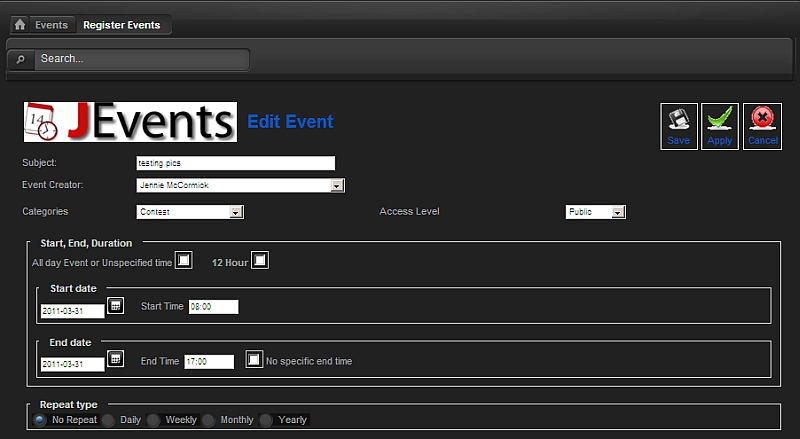
1. Once you have clicked on “Register Event” on the GAM2012 Main Menu bar on the right hand side of the screen the following screen will appear. Or click here to open the "Register Event" screen. Include as much information as you can, this will allow others to learn more about your event |
 |
|
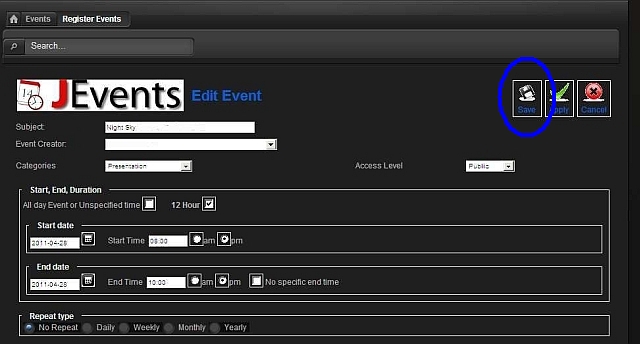
Note: If you need to take a break while adding your event informtion click the "Apply" button at the top of the screen, this will save your work but keep the page open for you to come back too. |
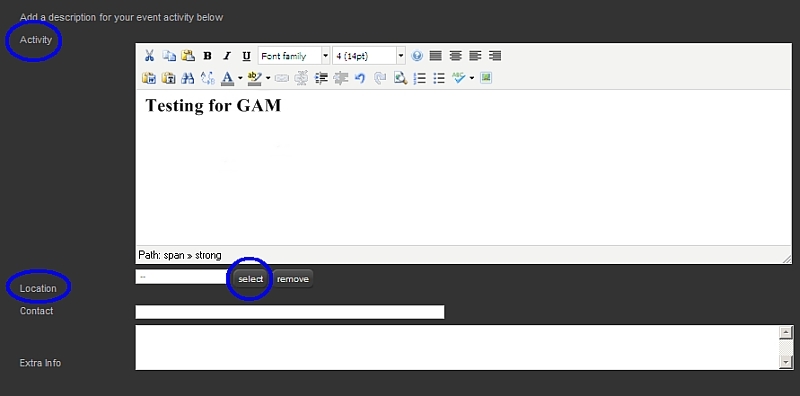
| "Activity” – Enter a description of your event and any other information you would like to include; see image below. Please Note: We have noticed a number of minor issues when copying and pasting directly from a Microsoft Word Document. We advise when adding text straight from a Microsoft Word document either; - Copy your text directly into ‘NotePad’ or ‘WordPad’ first and save as plain text (txt) before copying it into the Edit Screen box. - Use the Microsoft Word button on the editor screen (see below) and follow the instructions.. |
| “Location” - Click “Select” to choose the location of your event. |
 |
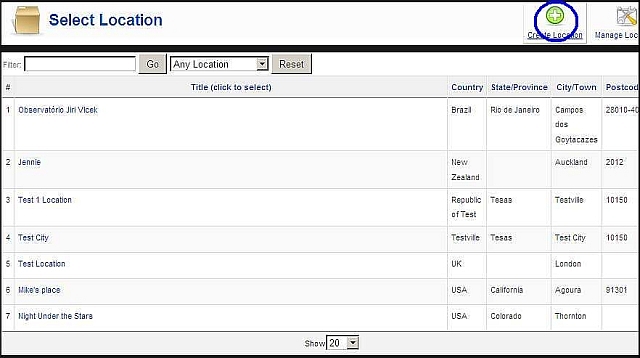
| The following screen appears. Click on the Green “Create Location” button to add your location. |
 |
| The “Location Edit” screen will appear; see image below “Details” – Fill in the details of your event. Telephone number is optional. If you wish to include an image to accompany your event, click “Browse.” This will open a window where you can select the image from your computer. Select the image and then click “Upload.” |
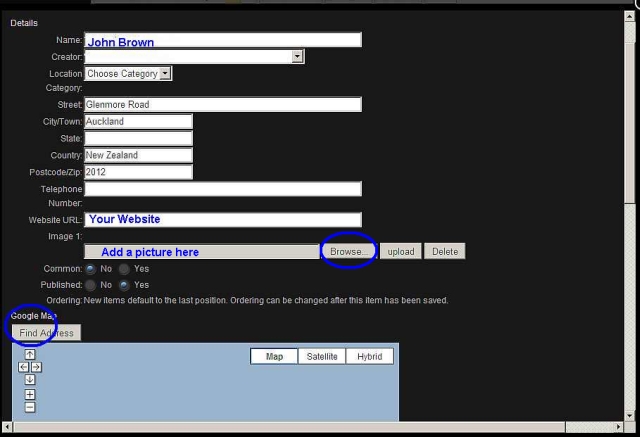 |
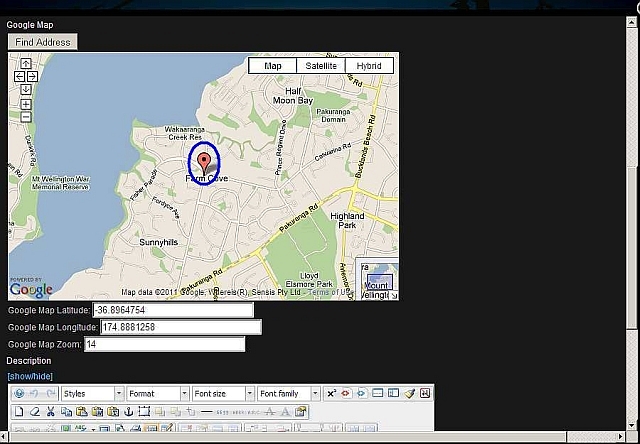
| Click “Find Address” only after the event location details have been added; be sure to add as much information as you can. A Google Map will appear and the location will be marked with a red marker pin as shown on the map below. If you want to show the location as a satellite image, click, 'Satellite.' |
 |
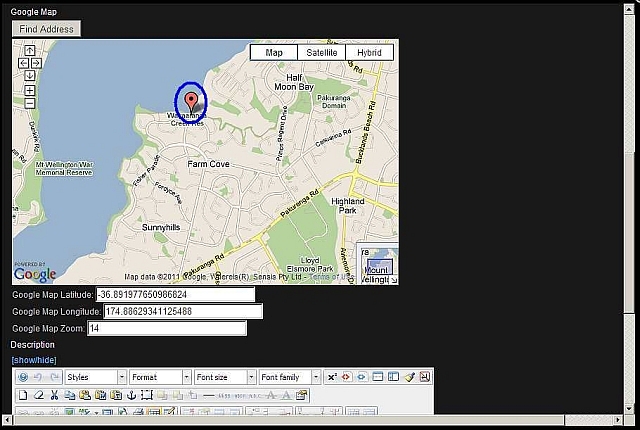
| Note: If this is not the correct location position, you can move the red marker pin by clicking on it and dragging it to a new position. See the image below. |
 |
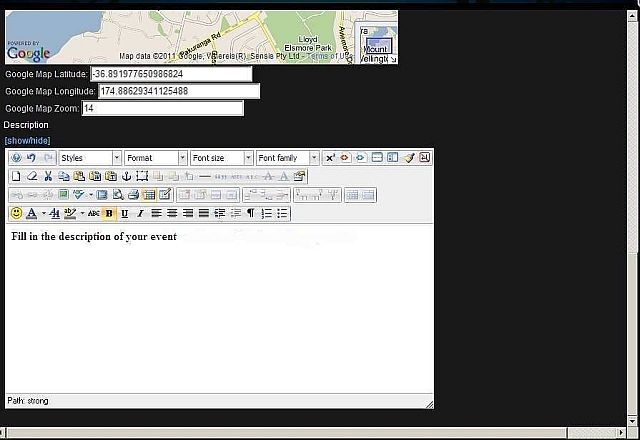
| “Description” – Add a description of your event. Please Note: We have noticed a number of minor issues when copying and pasting directly from a Microsoft Word Document. We advise when adding text straight from a Microsoft Word document either; - Copy your text directly into ‘NotePad’ or ‘WordPad’ first and save as plain text (txt) before copying it into the Edit Screen box. - Use the Microsoft Word button on the editor screen and follow the instructions. |
 |
| When all the information is correct, scroll to the top of the page and click “SAVE.” |
 |
| You will now be taken back to the “Select Location” screen where you will see your new event listed. Click on your event to edit any information you wish, once finished click "Save." Note: If you want to keep working on the edit screen but need to leave the computer for a short time, click "Apply" this will save your work but keep the page open for you to come back too. |


